Tampilkan postingan dengan label your. Tampilkan semua postingan

Golden Grains Pot Sized Pasta Use your noodle

The folks over at Golden Grain Pasta sent me a sample of their new pot-sized pasta and asked me to play around with it to see what I could come up with.  The logic behind pot-sized pasta is that we spend time breaking long noodles before cooking so that they cook and they arent poking out from the pot when youre cooking them.  Pot sized pasta eliminates the need for the breaking, and the subsequent tiny bits of pasta that go flying around your stove and the floor.  I have to say, cooking with the pot-sized pasta, after so many decades of breaking my pasta was really odd, because I just dumped it in and gave it a stir, much the same way I cook other shapes of pasta.  It cooked up the same, looked the same, and was merely shorter in length, and therefore more convenient to cook.  I found it worked excellently in my Pseudo Chicken Chow Mein dish.


Pseudo Chicken Chow Mein
Serves 6

Ingredients
1 lb spaghetti or linguine noodles
? cup chicken stock
¼ cup soy sauce (I use the kikkoman low sodium)
3 tablespoons Chinese oyster sauce (Lee Kum Kee brand is my favorite)
1 teaspoon toasted sesame oil
1 teaspoon sambal (Chinese chile sauce)
1 to 1¼ lbs boneless, skinless, chicken thighs, cut into 1 inch chunks
¼ cup vegetable oil (you’ll probably not use all of it)
1 ½  tablespoons freshly minced ginger
1 ½  tablespoons freshly chopped garlic
8 bunches of bok choy, washed, and then pulled apart into individual leaves
3 scallions, thinly sliced

Method
Cook pasta according to package directions, about a minute less than it asks for.  (9 minute pasta, cook for only 8 minutes.)  Drain, and set aside.

In a small bowl, or measuring cup, mix together chicken broth, soy sauce, oyster sauce, sesame oil, and sambal.  Set aside until needed.

In a large nonstick skillet or wok, heat 3 tablespoons of vegetable oil over high heat.  Add chicken, season with salt and pepper, and cook, until golden and fully cooked, about 7 minutes.  Add ginger and garlic, and cook until fragrant.  Add cooked noodles and bok choy and begin tossing so that noodles get coated with oil and bokchoy begins to cook, another 2 minutes.  Stir in sauce and cook, stirring occasionally, until sauce is absorbed and noodles are evenly coated, about 5 minutes.  Sprinkle scallions on top and give it one final toss.

Serve right away (although the cold leftovers are also pretty good.)

Printable recipe


Thanks Golden Grain for this fantastic new pasta length!


Read More..

Mapo Tofu with Korean Slant Aging with your glasses

I went to the eye doctor today, just for my typical check up to make sure that my prescription for my contacts were good and up to date.  I dont look forward to my eye doctor appointments, because invariably I end up in that situation where the optometrist begins asking the series of questions, "Is A better than B?  Do you like one or two?  B or C?  This one or this one?" and my head starts swimming as I try and make sure that in fact, B is more clear than C and 1 is easier to focus with than 2.  I hate making tiny decisions.

Today, I decided to complicate matters further because I was trying to figure out if I should update my glasses, which are officially 13 years old. I know - they ARE old, but bear in mind that I wear my contacts far more than my glasses, so glasses arent that big of a priority most of the time.  As Dr. T examined and tested my vision, I explained that it was harder to see at night and drive with my glasses and at the same time, it was getting harder to read smaller print.  She ran a series of evaluations for me and then determined that yes, in fact Im not seeing that great far or that great close.  The curse of aging.

Then came the series of complex decisions as to how to best manage this eye/glasses/contacts/prescription dilemma.  She explained progressive lenses (fancy word for bifocals with no lines), progressive contacts (fancy word for bifocals just stuck to my eyeball) and reading glasses (fancy for old lady in the room).  I started with my original goal of glasses that I would be able to see better with at night, should I need to drive, and we experimented with a few options, which ended up compromising my ability to READ at night with the same glasses.  Again the option of progressive lenses came up, to which I responded, "But cant I just TAKE OFF my glasses and read at night which is what I do already?"  She nodded, but given that Dr. T is all of 15 years old and no idea how aging women have issues with their eyesight, I dont think she was impressed with my practical solution.  (For the record, I am impressed with my low tech solution of REMOVING my eyeglasses.)

After the decision for the appropriate prescription, came the ever-harrowing decision of choosing a frame.  I spent about 15 minutes looking at a few, and after the series of decisions I had to make regarding HOW I was going to correct my vision, deciding WHAT I was going to look like in said glasses suddenly became so overwhelming that I began my shutdown process, which happens whenever I am confronted with too many decisions.  "Im going to come back, with my husband so he can help me decide" I told my Doc.  

"I can help you decide if youd like," she kindly offered.

"No.  I think I need my husband.  Hell have a strong opinion and itll help me decide," I said.

And with that, I walked out, eager to get away from the one hour long series of tiny decisions that ultimately just proved that Im getting old with bad eyes.

I ran home, to throw together, what has become my familys favorite quick dinner dish, Mapo Tofu with Korean Flavors.  I love it because I dont have to make decisions. I just MAKE it.  And when I MAKE it, the family just EATS it.  No decisions.  No complaints.  Just a complete quiet take down of a hearty meal that comes together so quickly that actually I should make it far more often.  Its mildly spicy (you can control it), savory, and just goes so well with a bowl of hot rice.  I flavor it with more Korean typical flavors like sesame oil and gochujang, and it just works.

More mapo tofu. Fewer decisions about my eyes.  That would be my ideal day.

Mapo Tofu with Korean Slant
Serves 6

Ingredients
1 teaspoon canola oil
1 teaspoon sesame oil
1 lb to 1 ¼ lb ground beef (I like organic ground beef from Costco)
2 tablespoons chopped garlic
½ teaspoon salt
2 tablespoons (or 1 tablespoon if you’re worried about spice) Korean chili pepper paste (gochujang)
2 tablespoons hoisin sauce
1 tablespoon soy sauce
Two 14-ounce package soft tofu, finely diced
1 1/2 teaspoon cornstarch
1/2 cup water
6 scallions, finely chopped
White rice, for serving

Method
Heat a large skillet until hot. Add both oils, followed by ground beef and garlic. Season with salt and cook over high heat, stirring and breaking up the meat, until crumbly and lightly browned, about 3 minutes.

Stir in the Korean chili pepper paste, hoisin and soy sauces, and cook, stirring, for 3 minutes. Gently fold in the tofu. In a small bowl, whisk the cornstarch into the water. Add to the skillet and simmer until the sauce thickens, 2 minutes. Stir in the scallions and serve.
Printable recipe

Yes.  Please.


Read More..

Your Peek At Those First Few Photographs

Hello everyone!

Thanks for patiently waiting for pictures. The good news is that we have a new computer...the bad news is that I really shouldnt be up this late posting pictures...but see...there is this newer, faster computer that was tempting me to post...

Our sons first few photographs after he was born on November 4, 2010:
This one is less than five minutes after he was born.

A few hours after birth waiting to get checked out.

A proud Daddy Rainmaker.

Not sure what is going on here...Dad was taking pictures; mom was recuperating.

This may have been the beginning of his bath.

Interspersed with a weight picture.
He was 20 1/2 inches long.
He now weighs 6 pounds 11 ounces.
Time to wash his hair for the first time.

Getting it wet...

Rubbing in the shampoo.

Isnt he lovely?

How about another one?

His first diaper...


Changed by experienced hands.

Ahh....swaddled and warm...much happier now.
I have more pictures to share, but I will have to post those later.
I hope you are all doing well!
Sincerely,
Sunshine Mama

Read More..

Modochis Mochi donut When your kids are on spring break

Its the time of year when my kids are on spring break, and I take it upon myself to obsess and perfect some dish since Im with the kids so much.  I have a lot of taste testers as I can use my own three and other families are home more and in need of a break so I even have a few more testers.

This years obsession (last years was boba tea) was a donut made with mochi flour. Ive been debating a good old yeast donut for a while, but havent had the chance to work through all the steps of dough making a yeast donut.  I heard about mochi donuts and took it upon myself to mess around with the stuff until I got something that I liked.

There were three uneven, not-so-skilled batches, and then there were the final four with subtle, yet meaningful differences.  What would the ideal texture be inside?  How should it look when you broke it open?  How crispy should the outside be?  What kind of finish should it have?  Children, Friends, and I explored the various permutations and silently, I cursed my obsessive nature as it came into direct conflict with my healthy side.  Fried dough?  Come on!  It just TASTES so good!  And it can be worked off...later, so dont worry about it.  You just need to make this perfect so that you can stop making it!  My healthy side simply whimpered in defeat as it couldnt combat the deliciousness of a mochi donut...7 times over.

When you make the mochi donut, SURROUND YOURSELF WITH FRIENDS who will prevent you from eating the entire batch ALL ON YOUR OWN!  It gets dangerous and you will thank me for this warning.

And now, on to the modochi itself.  The modochi has a crispy exterior and an amazing chewy interior.  When you bite into it, it doesnt collapse under your teeth but rather springs back at you forcing you to really commit to your bite.  And that springiness and chew is what keeps bringing you back for more and more, because its not soft dough -its dough with character. And it keeps reminding you that you want more, all the time, and that is its weapon.

The trickiest part of the mochi dough has to do with temperature.  There is the temperature of the mochi dough itself and the temperature of the oil.  Both are important to take seriously, because not taking those two aspects seriously will yield to modochis that are dark and that can be used as a golf ball.  Neither is really that desirable to stick in your mouth.  Your oil should be steady at around 375 degrees F and your milk needs to be scalded (nearly boiling) before being to your flour mixture.  If you bear these two crucial facts in mind, the rest is pretty easy (but maybe a little sticky.)

A final note, a mixer is your friend.  I cannot imagine doing this with your arms by hand, but it can be done...your arms may never be the same after, but it can be done.

Gather a few friends around and have loads of fun!  You wont regret it.

Modochi
Makes 20 donut holes

Donut Ingredients
1 lb box sweet rice flour (mochiko - I prefer Koda Farms brand) after further testing, the preferred mochi flour is actually THAI flour, which yields a fluffier texture.
¼ cup and 2 tablespoons white sugar
2 teaspoons baking powder
¾ cup whole milk
¼ cup (half a stick) unsalted butter
2 eggs, lightly beaten together

Method
In the bowl of a stand mixer with a dough hook (if you have) or in your mixing bowl, whisk together sweet rice flour, white sugar and baking powder.

In either a pot over medium heat, or in a microwave safe cup, cut up butter into small chunks and add milk.  The goal is to scald the milk at the same rate as melt the butter.  Heat milk and butter to steaming, but not boiling.  (My microwave accomplishes this in 1 minute 52 seconds.)

In the middle of your rice flour mixture, pour in heated milk butter mixture and begin beating for 2 minutes.  The rice flour will look strange at first but after 2 minutes you should begin seeing some clumps coming together. Add beaten eggs and scrape down sides of bowl and begin beating the dough for 8 minutes on medium high, to get everything  into a sticky yet workable mess.

In a pot, heat oil to 350F.  (I like smaller deeper pots with fewer donuts to fry in order to save oil, but if you like to fry them all at once, get a shallower wider pot.)  Oil your hands with spray oil (quickest way) and rub palms and fingertips together. Scoop about a golf ball amount of dough and roll into a ball.  Once oil is the right temperature drop into oil.  The modochi will sink to the bottom first and cook there for about 2 minutes and then float up to the top for the last 6 minutes of cooking time. While the modochi is on the bottom, give a quick stir so that the modochi doesn’t stick to the bottom.  Total cooking time for a donut hole is about 8 minutes.

Once donut is nice and golden and beautiful even in color, remove from oil and drain on a rack over a tray.  Continue rolling donuts until all are cooked.  While donuts are still warm either glaze them or roll them in a sugar cinnamon mixture.

Serve warm or later in the same day.  Modochis do NOT like being eaten the next day.

Glaze Ingredients (enough for 20 modochi)
4 tablespoons unsalted butter, melted
1 ½ cups powdered sugar
3 tablespoons water
1 tablespoon vanilla extract

Whisk together melted butter, powdered sugar, water and vanilla extract until glaze is uniform and smooth.  Dip donuts into glaze and roll around and then allow to dry on a drying rack.

Cinnamon Sugar Ingredients (enough for 20 modochi)
¼ cup white sugar
1 teaspoon cinnamon

Whisk together cinnamon and sugar.  Roll still warm donuts into mixture.  Set aside to cool.

Printable recipe
Make sure you call some people over before you start on this.

Read More..

Spiced Warm Chickpeas and Fresh Vegetable Salad When your student becomes your teacher

EDM - now we are even.

One of the most amazing things about teaching is the mastery that comes from teaching that thing that you know.  Im a better writer now than I was 20 years ago, because Ive been teaching writing for the past 20 years.  I often think back to high school and college and wish I had the depth of knowledge about writing I have now and shake my head at my innocence, my inexpertise, and my lack of writing ability.

If there is one thing Ive learned on this long journey as a teacher, Ive learned that when you can teach something well, it means you know something well.  If you cant teach it well, it often pushes you to learn it better so that you can teach it well.  This is why, for the past three years or so, Ive hired and paid my students to teach my own kids different skills.  Ive had a girls softball whiz, soccer stud, lefty baseball all-star, and my latest hire is a student drummer.  Hes worked with Son on his drumming for a few weeks, and my own arms and heart longed to take a few lessons myself, if only to pick up some of those small skills I think I need to become a decent drummer.  Unfortunately his availability and mine do not work out, so I havent been able to take a lesson.

However, last week, I had a really amazing opportunity and that was the chance to take a lesson.  Suddenly I found myself rubbing my hands with glee, not so much for the drum lesson itself, but for the opportunity to GET EVEN.  My drum playing student isnt exactly the model easy student to teach.  Everything comes with a question, a challenge, a refusal, a denial, and a mini argument before I get what I want out from him.  Dont get me wrong.  Im not angry about it, upset about it or think that its beyond my job.  It is my job and the questions, the challenges, refusals, denials and arguments all make me a better teacher.

But I was going to get to be in the drivers (students) seat for a bit, and it was going to be fun.  I planned in my head the things that I wanted to do, the behaviors I would exhibit, and the frustration I would cause him and I laughed the evil maniacal laughter of a true mastermind. [insert maniacal laughter here.  MUAHHAHAHHAHAHA.]  When the lesson started however, all thoughts of my torture flew out of my head because I was suddenly so keen to impress my student.  I discovered myself doing any number of insane things, all to impress my student with my mad skills.  (I dont have any, but still.)  He would call out and ask me to create certain basic rhythms and I would do my darnedest to perform them properly. Several times during the lesson I became so focused I tuned him out and he had to raise his voice (remember drums) to be heard.  At one point he raised his arms into the air and said, "THIS IS SO FRUSTRATING!" when I refused to listen to him and instead insisted on showing him the beat that I could perform.

In the end, I got a little bit even.  And it was so worth it.  It was fun and I learned something.  I think my student also learned how tough it is to teach the know-it-alls and how teaching, at the end of the day, can be back-breaking, spirit-changing, brain-numbing work, but it is worth it.  During the lesson I wasnt able to recreate a certain rhythm on the drums, but after my lesson, I practiced that rhythm over and over more than 30 minutes, and suddenly I mastered it.  I sent him a video, and his mom responded, "I think he was impressed."  I actually think he was impressed that he was able to teach me something.

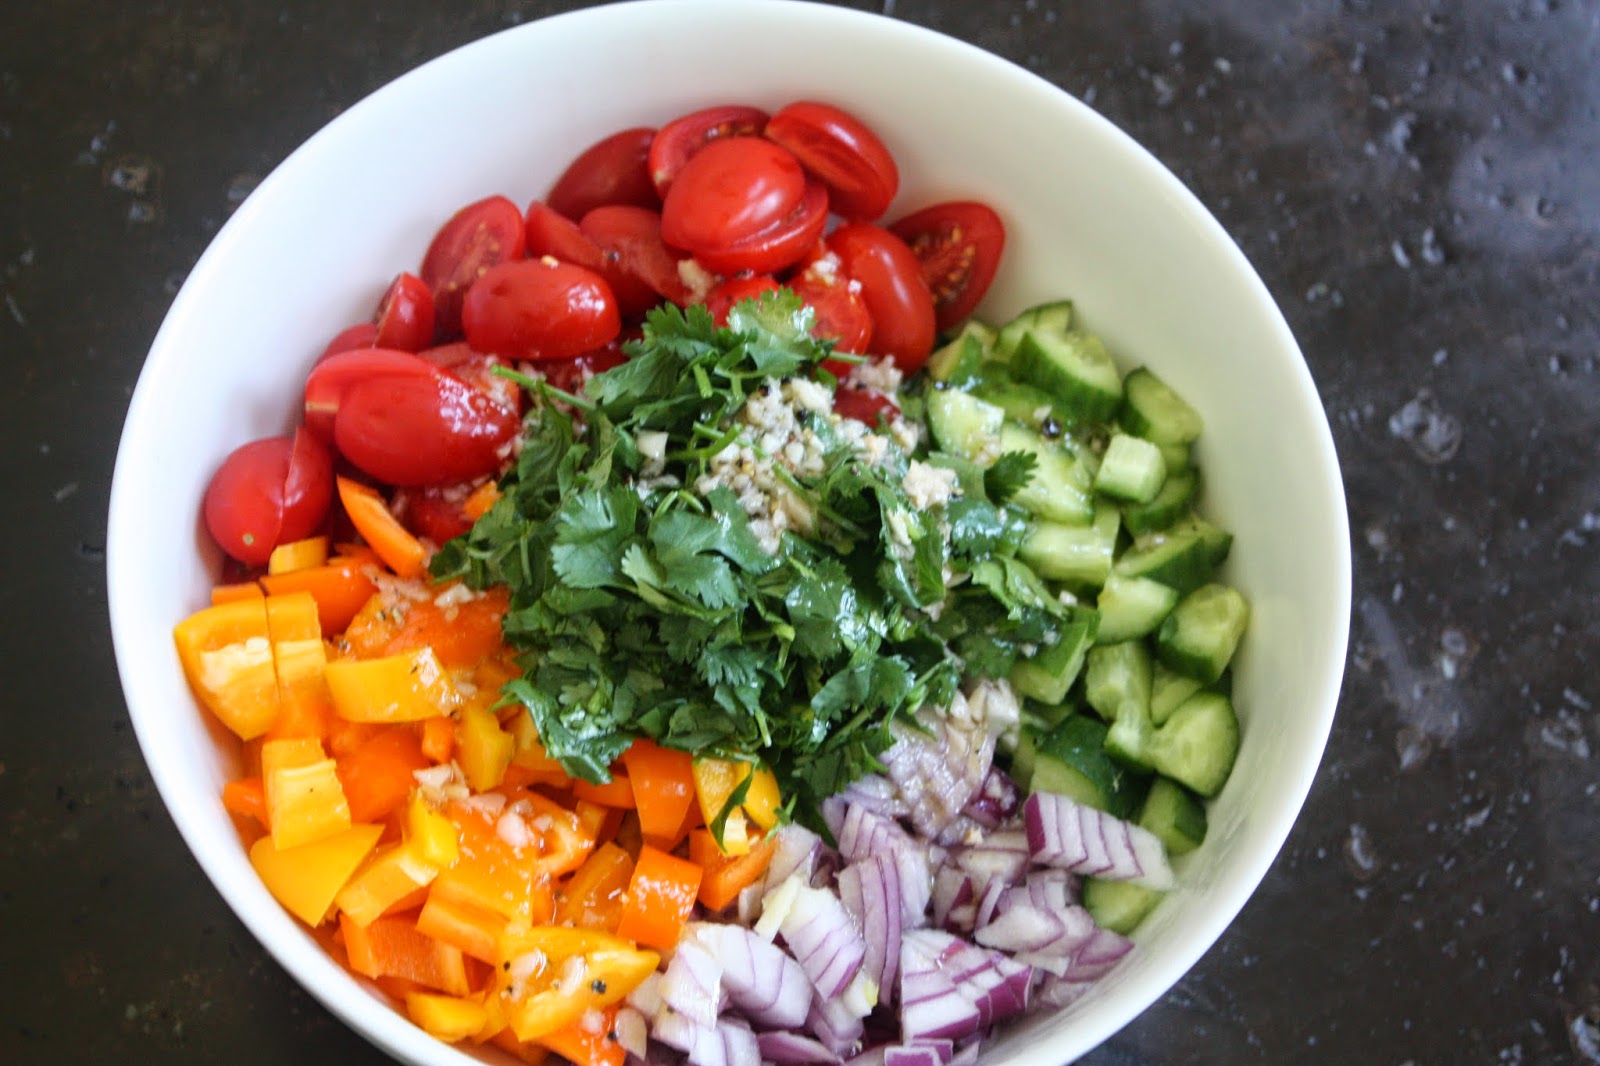
Now this salad impresses me all the time.  Whenever I make it (and Ive made it multiple times) I find myself saying, "Dang.  Im a great cook."  It really is only salad but somehow the addition of the warm spiced chickpeas takes it to a whole different place.  I love it with a little bit of yogurt and I love it as the side dish to the cardamom chicken dish I posted earlier.  Impress yourself if youd like and make this fantastic salad.

Spiced Warm Chickpeas and Fresh Vegetable Salad
Adapted from Jerusalem by Yotam Ottolenghi and Sami Tamimi
Serves 4

Ingredients
15 oz can chickpeas, drained and rinsed
1 teaspoon ground cumin
1 teaspoon ground cardamom
½ teaspoon ground cinnamon
¼  teaspoon salt
1 tablespoon olive oil

2 small cucumbers, cut into a ¼ inch dice
2 cups cherry tomatoes, cut in half
1 red, yellow or orange bell pepper, seeded and deveined, cut into ¼ inch dice
½ of a small red onion, peeled, and cut into small dice
¼ cup coarsely chopped cilantro
¼ cup coarsely chopped flat leaf parsley

5 tablespoons olive oil
1 lemon zested
2 tablespoons fresh lemon juice
1 ½ tablespoons red wine vinegar
1 teaspoon sugar
1 clove of garlic crushed
salt and pepper to taste

Method
In a small bowl, toss together chickpeas, cumin, cardamom,cinnamon, salt and olive oil.  Toss and coat chickpeas well.

In a large bowl, place cucumber, cherry tomatoes, bell pepper, onion, cilantro and flat leaf parsley.

In a jar or a sealable container, mix together olive oil, lemon zest, lemon juice, red wine vinegar, sugar, garlic and salt and pepper.  Set aside.

In a fry pan, add spiced chickpeas and fry over medium heat for 3 to 4 minutes, until chickpeas are slightly golden and warm.   Keep warm.

Serve salad by tossing vegetables and herbs with dressing, and adding a bit of warm chickpeas on top.  A dollop of yogurt is also a nice condiment.
Printable recipe

With Cardamom Chicken Rice with a dollop of yogurt

A really wonderfully inspiring cookbook. The pictures make me so hungry
Read More..